Configure pfSense bridge over multiple NICs as LAN
pfSense doesn’t seem to have a simple “bridge-all-NICs” option. Really?
In the past I’ve used “raw” pf on FreeBSD as a firewall for a variety of
situations both large and small, but this week I started playing with an
inexpensive, fanless, multi-NIC box as a potential firewall and router running
pfSense. Interestingly, the first thing I realized is that I could not find in
pfSense any completely user-friendly (read: single checkbox) option to turn
all but the WAN-designated NIC into a single bridged LAN. Seems like a
pretty basic thing someone would want to do as a home router, or simply avoid
the switching overhead of packets amongst different subnets. A quick search
for other solutions didn’t turn up one that I thought was really complete,
hence this guide.
Before beginning, note that it’s not that hard, but it does require a few
steps which might require either console access, or at least some
reconfiguration of your local NIC to have a manual IP. Additionally, your
interface names may be slightly different (e.g. LAN, Opt1, Opt2), but that it
should be straightforward to map names from my examples.
If you don’t want to look through all the pretty pictures, the basic idea is:
- Assign and Enable additional NICs
- Create Bridge Interface
- Assign Bridge Interface an IP Address
- Create Interface Group
- Add Firewall Rule
- Add DHCP Server on the Bridge
- Remove IP address from EM1
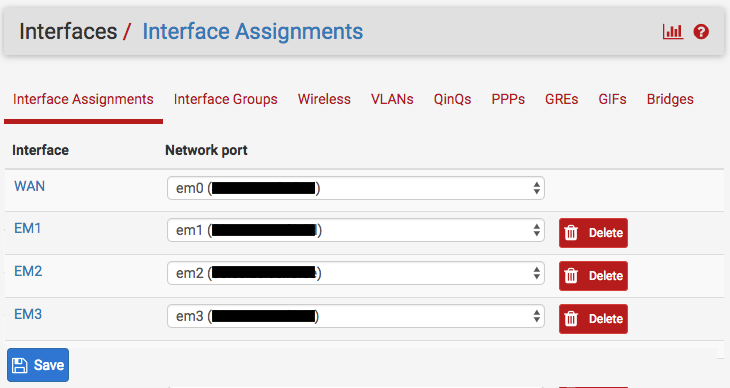
Assign and Enable additional NICs:
First thing is to enable all the NICs you have and want included in the local
LAN Bridge. In pfSense, this is via the menu item Interfaces >> (assign):
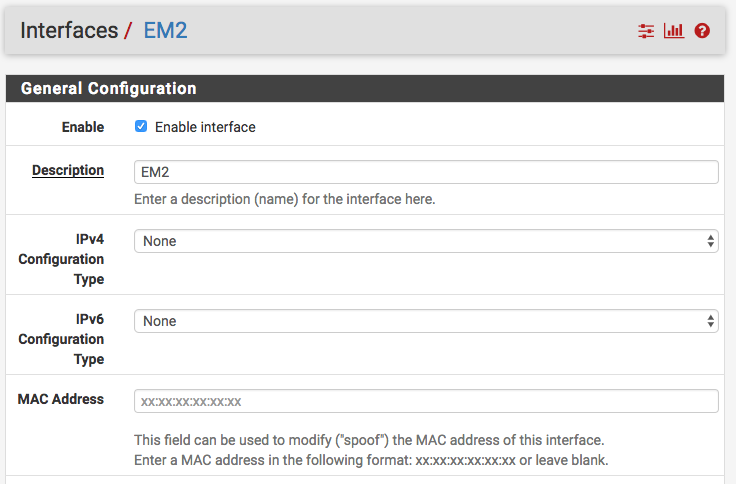
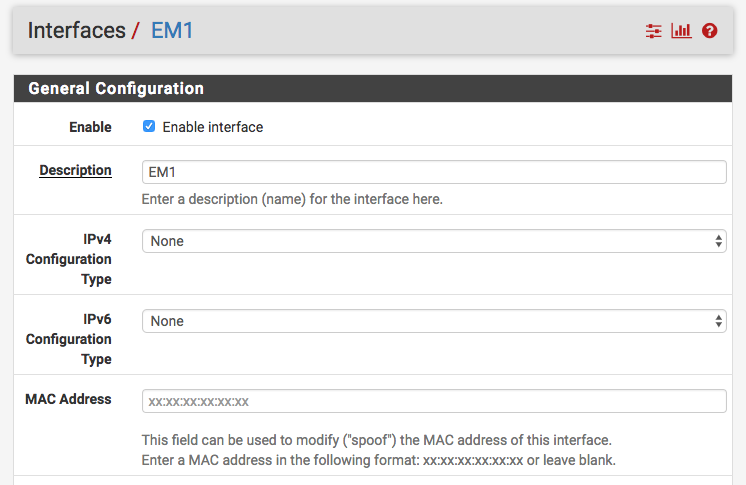
Then, for each interface assigned, enable that interface via the
Interfaces >> EM
menu item, and ensure it has None specified as the IPv4 and IPv6 address:
Create Bridge Interface:
Now you need to create a virtual bridge interface across all of the NICs you
want included in the bridge; Use the menu
Interfaces >> (assign) >> Bridges.
Use the Add + button to add a bridge and select all
interfaces you want as part of the bridge, but do not include the
WAN interface:
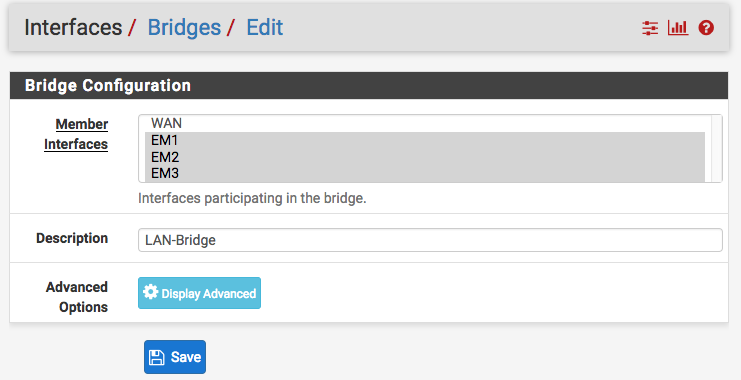
When done, it should look like this:

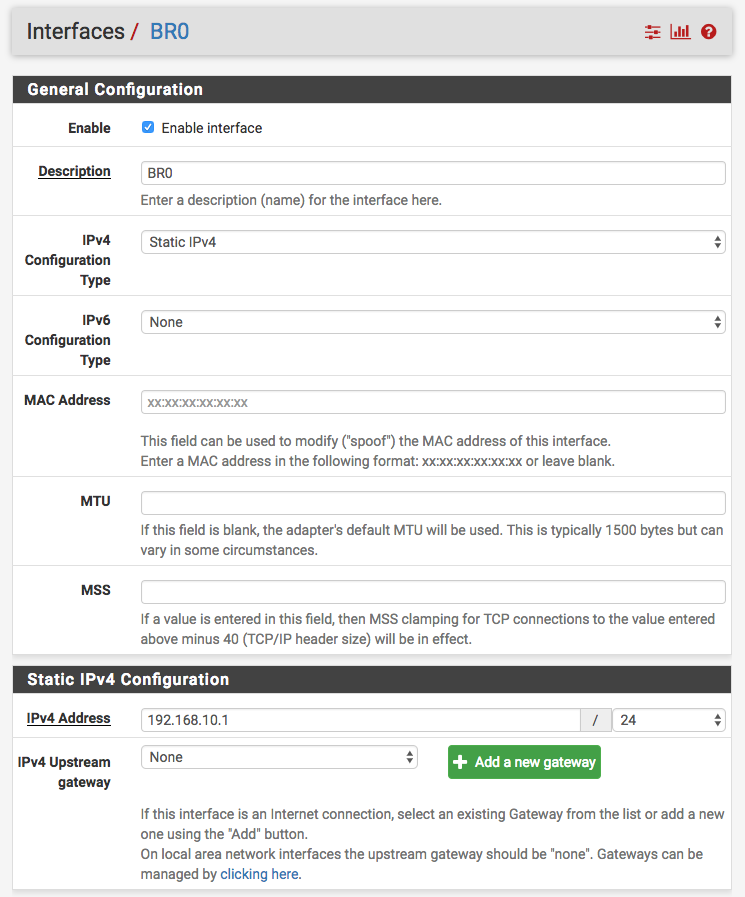
Next, assign an IP address (IPv4, minimally) to the bridge via the
Interfaces >> BR0 menu:
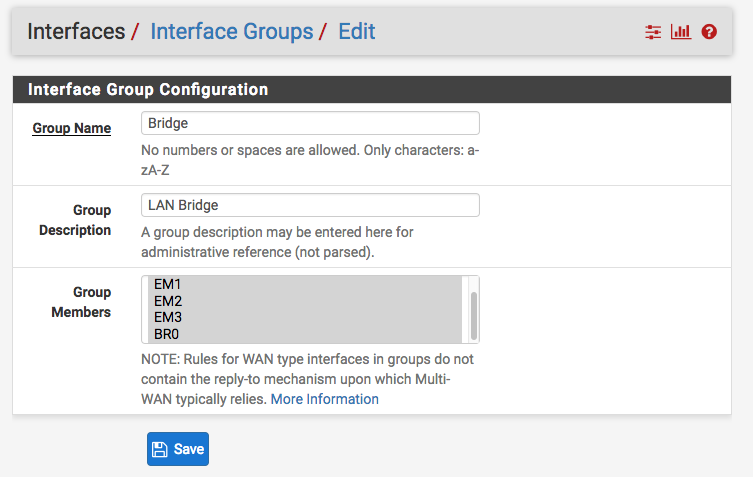
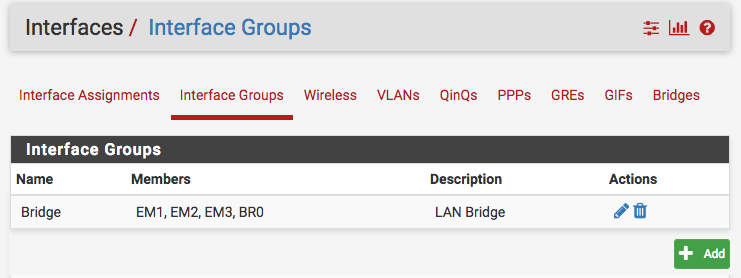
Create Interface Group
Next create an interface group including all NICs and the bridge interface .
This will be used for LAN firewall rules. Use the menu
Interfaces >> (assign) >> Interface Groups.
Use the Add + button to add the group
and select all interfaces you want as part of the bridge group, including
the bridge itself, but do not include the WAN interface:
It should look like this when done:
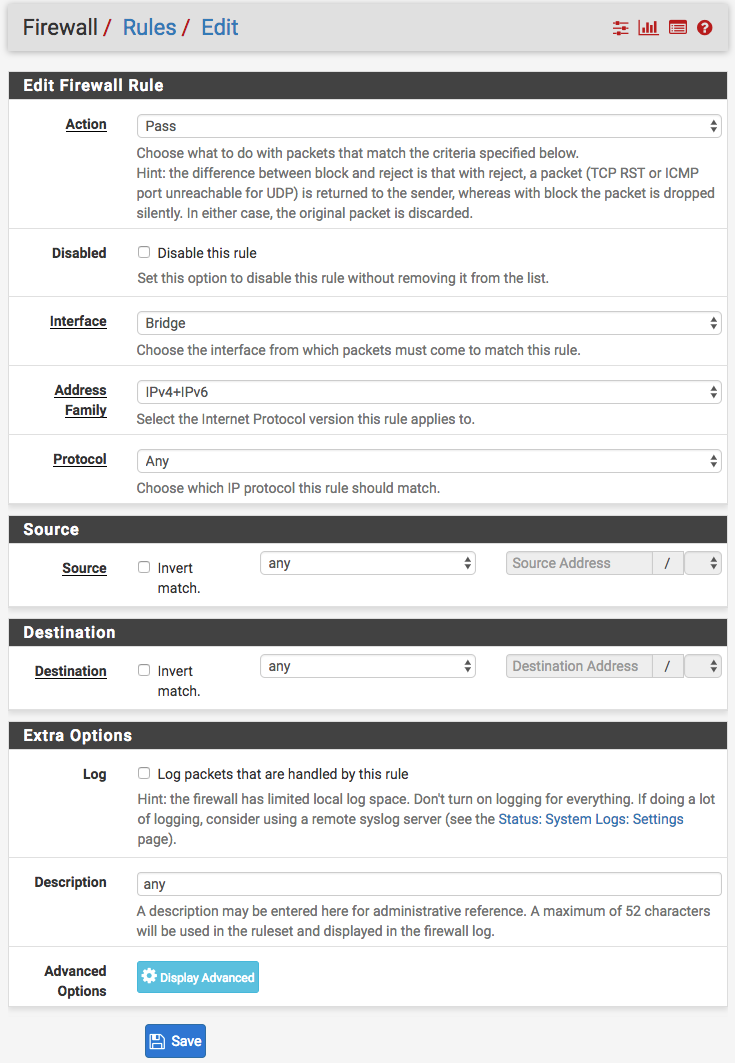
Add Firewall Rule
Next you need to add a firewall rule to allow traffic to flow amongst the
interfaces of the interface group, as a single, unconstrained LAN. Select
Firewall >> Rules >> Bridge and add a rule like this:
Add DHCP Server on the Bridge
Next, assuming you want to run a DHCP server on your local LAN, configure the
DHCP server on the Bridge interface via the menu item
Services >> DHCP Server >> BR0 :

Remove IP address from EM1
Finally, as cleanup, you should remove the IP address from EM1. You may need
to disable the DHCP server on that interface first. Select
Interfaces >> EM1 :
At this point you should have a fully functional, local area network bridge across all your interfaces.